

10 Creative Ways to Use Custom Stamps in Your Business
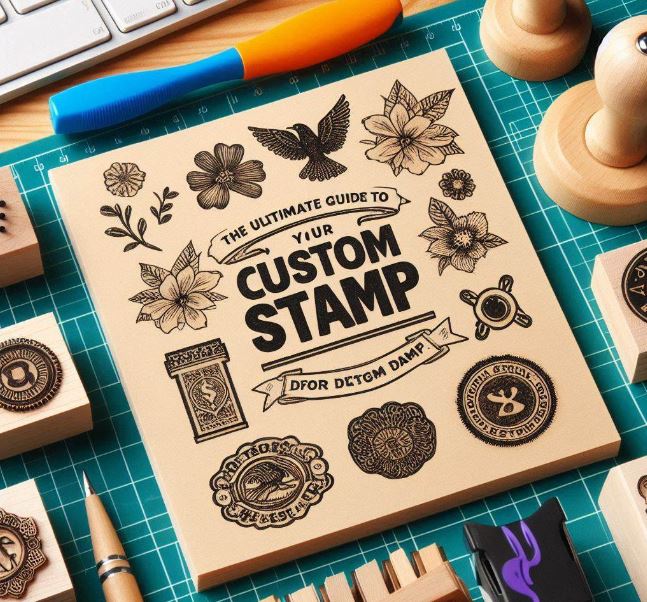
The Ultimate Guide to Designing Your First Custom Stamp
Introduction
In today's world of digital communication, there's something uniquely satisfying about the tactile experience of using a custom stamp. Whether you're a business owner looking to add a personal touch to your brand, an artist seeking to sign your work, or simply someone who loves to add flair to your correspondence, designing your first custom stamp can be an exciting journey. This comprehensive guide will walk you through the process of creating a stamp that's not just functional, but also a true representation of your style or brand. From understanding the basics of stamp design to choosing the right elements and finalizing your creation, we'll cover every step to ensure your first custom stamp is a success.
Understanding the Basics of Stamp Design
Before diving into the creative process, it's crucial to understand the fundamental principles of stamp design. Stamps, by their nature, have certain limitations and requirements that differ from other forms of design. The most important concept to grasp is that stamps create impressions through negative and positive space. The areas that are raised on the stamp will transfer ink, while the recessed areas will not. This means that your design needs to work well in a single color and should be clear and legible when reduced to simple lines and shapes. Another key consideration is the size of your stamp. Stamps come in various sizes, from small, simple designs meant for initials or logos, to larger, more complex stamps for addresses or detailed illustrations. The size you choose will depend on your intended use and the level of detail in your design. Remember that intricate designs may not reproduce well on very small stamps, while overly simple designs might look lost on larger stamps. It's essential to strike a balance between your design's complexity and its size to ensure the best results. Durability is another factor to keep in mind. Your stamp will be used repeatedly, so the design should be sturdy enough to withstand multiple impressions without losing its shape or clarity. This often means avoiding extremely thin lines or tiny, isolated elements that might wear down quickly or fill in with ink over time.
Defining the Purpose of Your Stamp
Before you start sketching ideas, take some time to clearly define the purpose of your stamp. Are you creating a business stamp to professionalize your documents? A decorative stamp to embellish craft projects? Or perhaps a personalized stamp for your stationery? The intended use of your stamp will greatly influence its design. For instance, a business stamp might need to include specific information like your company name, logo, and contact details, while a decorative stamp might focus more on artistic elements or patterns. Consider also the surfaces you'll be stamping on. Different materials may require adjustments to your design. Stamping on rough paper, for example, might require a simpler design with bolder lines compared to stamping on smooth cardstock. If you plan to use your stamp on a variety of surfaces, aim for a versatile design that will work well in different scenarios. Think about the impression you want to make – quite literally. A stamp is often one of the first things a person interacts with when receiving a letter or document from you. It can set the tone for your communication or brand. A formal, traditional design might be appropriate for official documents, while a more whimsical or artistic stamp could be perfect for personal letters or creative projects. Your stamp's design should align with and reinforce the message you want to convey.
Choosing Your Design Elements
Now that you have a clear purpose in mind, it's time to decide on the elements that will make up your stamp design. For text-based stamps, consider the information you need to include. This might be your name, address, business details, a slogan, or a call to action. When it comes to fonts, choose ones that are clear and legible, even when reduced to stamp size. Sans-serif fonts often work well for stamps as they tend to be clearer in small sizes, but a carefully chosen serif font can add a touch of elegance if that suits your purpose. If you're including graphical elements or a logo, simplicity is key. Complex images with lots of small details may not reproduce well and could become muddied or unclear when stamped. Opt for clean lines and shapes that will be easily recognizable. Remember that your stamp will likely be monochromatic, so any design elements need to work well in a single color. Consider the overall composition of your stamp. The arrangement of text and graphical elements should be balanced and visually appealing. You might want to sketch out several different layouts to see which one works best. Pay attention to the spacing between elements – too crowded, and your stamp might look cluttered; too sparse, and it might lack impact. Don't forget about negative space in your design. The empty areas in your stamp are just as important as the inked areas. Clever use of negative space can make your design more striking and memorable. It can also help to ensure that your stamp creates a clear impression, as too much solid inked area can sometimes lead to smudging or incomplete transfers.
Selecting the Right Style
The style of your stamp should reflect its purpose and your personal or brand aesthetic. Are you going for a classic, traditional look? A modern, minimalist design? Or perhaps something more artistic and unique? Your choice of style will influence every aspect of your design, from the font selection to the use of decorative elements. For a traditional style, you might opt for serif fonts, formal language, and classic borders or emblems. This can work well for official business stamps or those used on formal correspondence. A modern style might incorporate sans-serif fonts, clean lines, and plenty of white space, suitable for contemporary businesses or personal stamps with a sleek look. For a more artistic or whimsical style, you could include hand-drawn elements, decorative fonts, or illustrative components that reflect your personality or brand identity. Consider also the emotional response you want your stamp to evoke. A stamp with rounded edges and flowing script might come across as friendly and approachable, while one with sharp angles and bold typography might appear more authoritative or professional. The style you choose should align with the impression you want to make and the context in which the stamp will be used. Remember that while trends can be tempting, a classic design often has more longevity. Unless you plan to update your stamp frequently, aim for a style that will still look good and feel relevant years down the line.
Practical Considerations in Stamp Design
As you refine your design, there are several practical aspects to keep in mind. First, consider the type of stamp you'll be using. Self-inking stamps, for instance, usually have a rectangular impression area, while traditional rubber stamps can come in various shapes. Ensure your design works well within the constraints of your chosen stamp type. Think about the ink color you'll be using most often. While you can usually change ink colors, many people stick with a single color for consistency. Dark colors like black, navy, or dark green tend to show up well on most papers. If you plan to use lighter colors, you might need to adjust your design to ensure it remains legible. Consider also the durability of your design. Areas with very fine details or thin lines might wear down more quickly with repeated use. If you're creating a stamp for frequent use, it might be wise to slightly thicken lines or simplify very intricate parts of your design to ensure it lasts longer. Another practical tip is to include a visual indicator of the stamp's orientation. This could be as simple as a small arrow or line at the bottom of the design. This can be particularly helpful for rectangular stamps, ensuring that you always stamp in the correct orientation.
Creating Your Design
Now that you've considered all the elements and principles of good stamp design, it's time to create your actual design. If you're artistically inclined, you might start by sketching your ideas on paper. This can help you play with different layouts and elements before moving to digital design. For the digital design process, you have several options. If you're comfortable with graphic design software like Adobe Illustrator or CorelDRAW, these can give you the most control over your design. These programs allow you to create vector graphics, which can be easily scaled without losing quality – an important feature for stamp designs. However, if you're not familiar with professional design software, don't worry. Many online stamp design tools, including StampsDesigner, offer user-friendly interfaces that allow you to create professional-looking stamps without advanced design skills. These tools often come with templates and pre-made elements that you can customize to suit your needs. When designing digitally, work in black and white to ensure your design looks good in a single color. Pay close attention to the balance of positive and negative space in your design. It can be helpful to periodically view your design at actual size to ensure all elements remain clear and legible when reduced to stamp size.
Testing and Refining Your Design
Before finalizing your stamp design, it's crucial to test it thoroughly. If you're using an online design tool, it should provide a preview of how your stamp will look. Examine this carefully, looking for any areas that might be unclear or problematic when stamped. A good way to test your design is to print it out at actual size on paper. This gives you a tangible sense of how your stamp will look and can help you identify any issues with size, spacing, or legibility. Hold the paper at arm's length – if you can still read and understand all elements of your design, that's a good sign. Don't be afraid to go through several iterations of your design. Small tweaks can make a big difference in the final result. You might find that certain elements need to be enlarged, spacing adjusted, or lines thickened to ensure a clear impression. If possible, it can be very helpful to create a prototype of your stamp. Some services offer this option, allowing you to test your design in actual stamped form before committing to a final version. This can be particularly valuable for complex designs or if you're planning to order multiple stamps.
Finalizing Your Stamp Design
Once you're satisfied with your design and have tested it thoroughly, it's time to finalize it for production. If you've been working with an online stamp design tool, this process is usually straightforward – you'll typically have options to preview your design, make any final adjustments, and then place your order. If you've created your design using graphic design software, you'll need to prepare your file according to the stamp manufacturer's specifications. This usually involves creating a high-resolution black and white image, often in a specific file format like PDF or EPS. Before submitting your final design, double-check all text for spelling and accuracy. It's easy to overlook small errors, and you don't want to discover a mistake after your stamp has been produced. Consider also ordering any accessories you might need with your stamp, such as extra ink pads in different colors. This can give you more flexibility in how you use your stamp once it arrives.
Caring for Your Custom Stamp
Once you receive your custom stamp, proper care will ensure it lasts as long as possible. Always cap your stamp when not in use to prevent the ink from drying out. Clean your stamp periodically with a mild soap and water solution, especially if you switch between different ink colors. Store your stamp in a cool, dry place away from direct sunlight. Extreme temperatures and humidity can affect the rubber and potentially warp your stamp over time. If you notice your stamp starting to create less clear impressions, it might be time to re-ink the pad or replace it. Regular maintenance will keep your stamp creating crisp, clear impressions for years to come.
Conclusion
Designing your first custom stamp is an exciting process that allows you to create a unique tool for personal expression or business branding. By understanding the principles of stamp design, carefully considering your stamp's purpose and style, and paying attention to practical details, you can create a stamp that not only serves its function but also beautifully represents you or your brand. Remember, the key to a great stamp design is balance – between creativity and functionality, between simplicity and detail, and between your vision and the technical requirements of stamp production. Don't be afraid to experiment with different designs, and take the time to test and refine your ideas. With the guidance provided in this ultimate guide and the user-friendly tools available on platforms like StampsDesigner, you're well-equipped to create a custom stamp that you'll be proud to use. Whether you're stamping business documents, crafting projects, or personal letters, your custom-designed stamp will add a special touch that's uniquely yours. So, why wait? Start designing your first custom stamp today and make your mark on the world!


